Author: Site Editor Publish Time: 2025-08-05 Origin: Site
Last updated: August 31, 2026
Infrared welding joins thermoplastic components by heating the joint area without direct contact. The process can support clean, repeatable production, but the lamp alone does not determine weld quality. Material compatibility, infrared absorption, joint geometry, surface temperature, heating distance, clamping and cooling must work together as one controlled process.
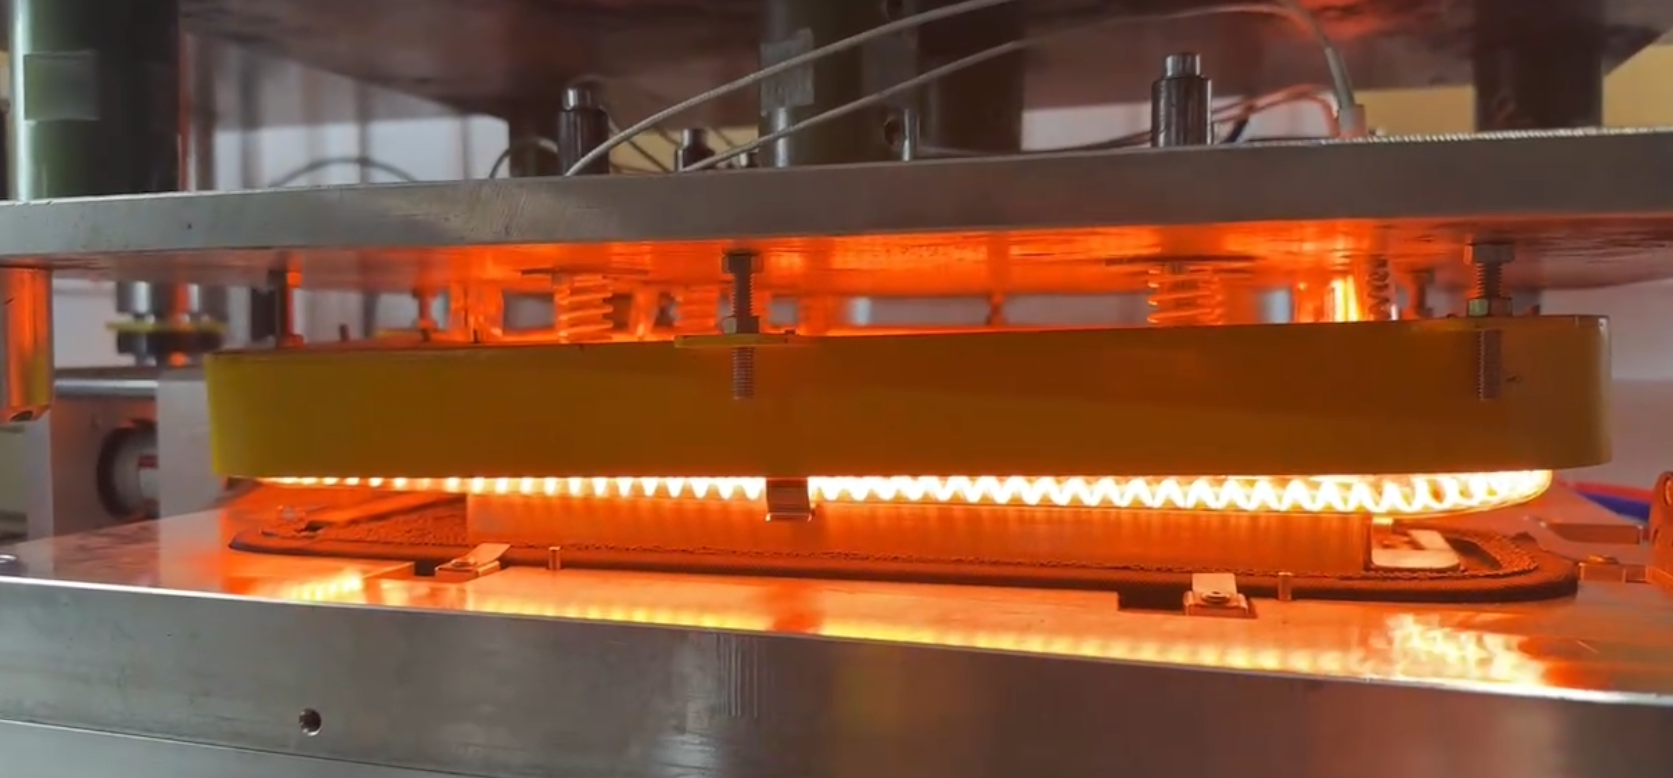
Infrared heating can prepare thermoplastic joint surfaces before the parts are pressed together under controlled conditions.
Before selecting an infrared lamp, confirm that the two components can form a reliable weld. Materials from the same polymer family are generally easier to evaluate, while blends, fillers, flame retardants, colorants and recycled content can change both melting behavior and infrared response. The material supplier's data should be reviewed together with actual production samples.
A plastic surface heats only when it absorbs enough incident infrared energy. Color, pigment concentration, wall thickness, surface finish and reinforcing fillers can change absorption significantly. A dark component may absorb strongly, while a clear or lightly colored part may transmit more radiation. Transmission welding may use an infrared-transmitting upper part and an absorbing lower part or interface, whereas surface welding normally heats both mating faces before assembly.
The joint must provide enough controlled melt volume to form a continuous bond without excessive squeeze-out. Flat mating surfaces, ribs, energy-directing features and controlled collapse distances can behave differently. Sharp changes in wall thickness may also produce uneven heating. Prototype trials should therefore use the intended production geometry rather than flat material coupons alone.
Emitter selection should be based on the absorption behavior of the plastic, required response time, target area and available installation space. Quartz infrared lamps can deliver controllable radiant energy and can be arranged in zones to follow the shape of the joint. The choice between short-wave, medium-wave and other emitter configurations should be verified through heating trials.
Short-wave lamps respond rapidly and are useful when a production line requires quick start-up, accurate timing or frequent power changes. Their high radiant intensity can be valuable for short cycles, but it also makes distance, exposure time and shielding important. Thin edges and dark areas should be checked carefully for overheating.
Medium-wave and carbon emitters may provide a more gradual heating response for plastics that absorb effectively at longer wavelengths. They can be considered when surface heating uniformity is more important than the fastest possible response. Practical selection should be based on measured surface and interface behavior, not on wavelength labels alone. For broader context, see the quartz versus ceramic infrared heater guide.
The heating gap affects irradiance and temperature uniformity. If the lamp is too close, local hot spots may develop; if it is too far away, cycle time may increase and surrounding areas may receive unnecessary heat. Reflectors, masks and independently controlled zones can concentrate energy on the joint while protecting cosmetic surfaces, seals and nearby electronic components.
After heating, the parts must be transferred and pressed together consistently. Fixtures should control alignment, collapse distance and pressure without distorting the softened components. Pressure must be sufficient to consolidate the molten interface, but excessive force can expel too much material or create residual stress. Cooling under controlled restraint is often as important as the heating stage.
| Process Variable | Why It Matters | Recommended Validation |
|---|---|---|
| Emitter wavelength and power | Influence absorption rate and surface response | Compare heating curves on actual molded parts |
| Lamp-to-part distance | Affects intensity and uniformity | Map temperatures across the complete joint |
| Exposure time | Determines melt depth and thermal penetration | Inspect melt condition and completed weld sections |
| Clamping pressure | Controls consolidation and material displacement | Measure collapse and test joint strength |
| Cooling time | Influences dimensional stability | Release parts at several verified temperatures |
Lamp power and exposure time are machine inputs, not direct evidence that the joint reached the required condition. Surface temperature should be measured during development with suitable sensors, thermal imaging or instrumented samples. Measurement settings must account for emissivity, reflections and the viewing angle of glossy plastics.
Temperature mapping should cover the center, edges, corners, ribs and any sections shadowed by the fixture. The goal is a stable heating window across the entire joint, not simply a high average temperature. A zoned industrial infrared heating system can make it easier to correct local differences without overheating the rest of the component.
Process validation should include lamp warm-up, heating, transfer, pressing, cooling and part removal. Record the actual settings and measurements that produce acceptable joints. If the equipment includes several lamps or zones, verify the effect of each zone rather than adjusting total power alone.
Weld evaluation may include visual inspection, leak testing, burst testing, peel or tensile testing, sectioning and dimensional checks, depending on the component. Samples should represent realistic variations in molding conditions, pigment, recycled content, ambient temperature and part storage. The validated operating window should be wider than a single successful setting.
For applications that require rapid lamp response and precise zone control, the guide to short-wave infrared heat lamps provides additional selection context.
Weak or incomplete weld: Check material compatibility, interface absorption, surface contamination, melt depth and transfer time.
Burning or discoloration: Reduce local intensity, increase distance, shorten exposure or improve zone balance.
Excessive flash or collapse: Review melt volume, pressure, fixture stops and heating time.
Warping: Improve heating symmetry, part support and cooling restraint.
Variable strength: Examine molded-part variation, lamp output, alignment and the repeatability of transfer and clamping.
Lamp replacement should also be managed as a process change. Confirm electrical specifications, heated length, connection type, reflector arrangement and installed position before qualification. Do not assume that two lamps with similar dimensions will produce identical heating behavior.
Can infrared lamps weld every type of plastic?
No. Infrared heating can prepare many thermoplastics for welding, but the materials must still be chemically and mechanically compatible. Thermosets do not remelt in the same way as thermoplastics.
Should both plastic surfaces be heated?
It depends on the joint and material system. Some processes heat both mating faces directly, while transmission welding directs radiation through one component to an absorbing interface.
How should the correct lamp power be selected?
Power should be determined from the heated area, absorption behavior, required temperature profile, cycle time and installation geometry. Trial data from production-equivalent parts is more reliable than a wattage estimate alone.
Why does a weld fail even when the surface looks melted?
The interface may have uneven melt depth, contamination, excessive transfer delay, insufficient pressure or incompatible materials. Appearance alone does not confirm weld strength.
YFR can review your plastic material, joint dimensions, target cycle, available heating distance and electrical requirements to support emitter and zone configuration. Contact YFR to discuss your infrared plastic welding application.


