
Author: Site Editor Publish Time: 2025-07-21 Origin: Site


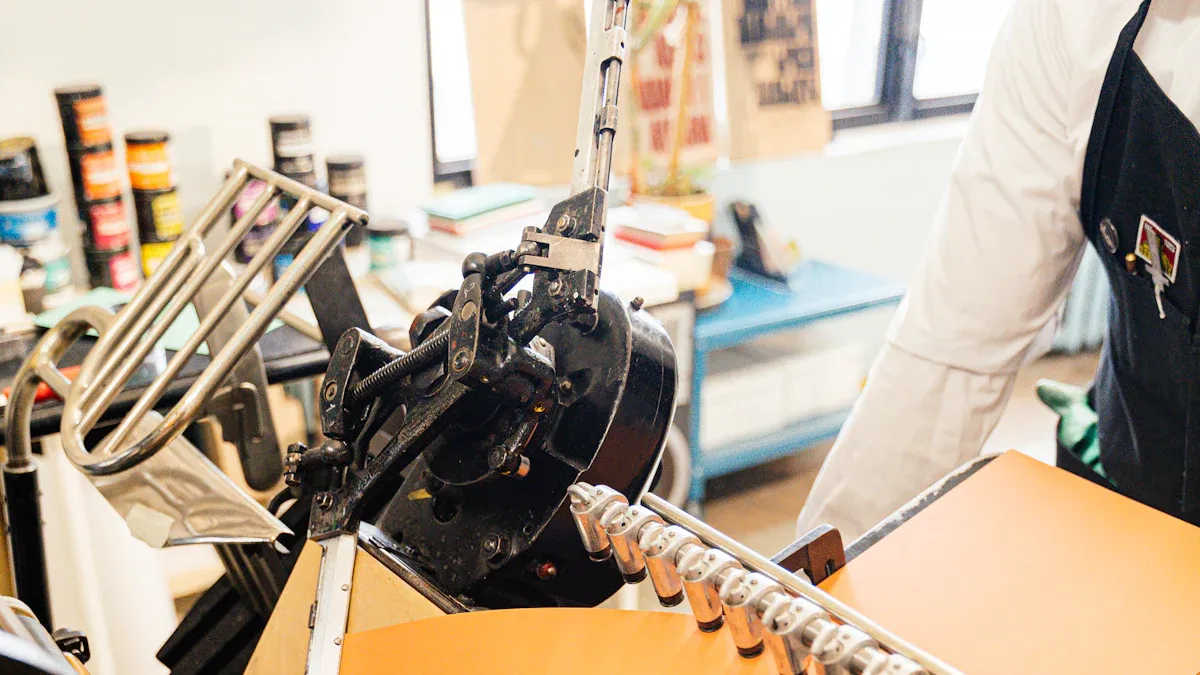
I rely on an infrared curing lamp to boost performance in my printing operations. This technology uses focused infrared energy to heat ink on the substrate, which speeds up the drying process for inkjet jobs that do not use UV inks. I have seen firsthand how an infrared curing lamp can cut drying times from minutes to seconds, making high-speed printing possible for banners, posters, and textiles. Efficient drying ensures sharp images and consistent colors. Brands like YFR deliver advanced solutions that fit directly into my printing machine setup.
Infrared curing lamps speed up ink drying by using focused heat, cutting drying times from minutes to seconds.
Different types of IR lamps (near, medium, far-infrared) suit various inks and materials for efficient drying.
IR lamps work best with water-based and solvent-based inks, ensuring sharp images and preventing smudging.
Combining IR lamps with other drying methods like UV or hot air improves drying speed and print quality.
Choosing the right lamp depends on your printing machine, ink type, and substrate to avoid damage and ensure efficiency.
Regular maintenance, like cleaning lamps and checking bulbs, keeps the curing system reliable and extends its life.
IR lamps reduce energy use by heating only the ink and substrate, lowering costs and environmental impact.
Safety is crucial: keep lamps away from flammable materials, monitor temperature, and never leave them unattended.
When I work with a printing machine, I rely on an infrared curing lamp to dry and cure ink quickly. This device emits focused IR energy, which heats the ink and substrate directly. The heat causes the ink to dry much faster than traditional air drying. I find this essential for high-speed printing jobs, where every second counts. The IR energy penetrates the ink layer, evaporating solvents or water efficiently. This process works especially well for water-based and solvent-based inks, which do not respond to UV curing. I have noticed that using an infrared curing lamp ensures sharp images and prevents smudging, even at high production speeds. YFR stands out as a brand that delivers reliable IR solutions for various printing needs.
I have used different types of IR lamps in my printing operations. Each type has unique characteristics and applications. The table below summarizes the main types of IR lamps used in printing machines:
Type of Infrared Lamp | Wavelength Range (microns) | Key Characteristics | Application in Printing Machines |
|---|---|---|---|
Near-Infrared (Short Wave) | 0.76 - 1.5 | Fast heating and cooling (1-3 seconds), high radiation efficiency (>96%), strong for high-density materials, quickly absorbed by water films | Widely used for drying and curing in high-speed printing, especially effective for water-based inks and solvents |
Far-Infrared (Long Wave) | 1.5 - 400 | Fast and uniform heating, small thermal inertia, high electrical radiation conversion efficiency (60%-75%), strong penetration for low-density materials | Used for drying and curing inks and coatings on low-density materials, providing uniform heating |
Medium-Wave Infrared (Carbon Emitters) | N/A (between near and far) | Energy-efficient drying option for water-based inks | Alternative drying method in printing processes |
I often choose short-wave IR lamps when I need rapid heating and cooling. These lamps operate in the near-infrared range and deliver high radiation efficiency. They work best for high-speed printing, especially with water-based inks. The quick absorption by water films means I can dry prints in seconds, which keeps my workflow moving smoothly.
Medium-wave IR lamps, sometimes called carbon emitters, provide a more energy-efficient drying option. I use these when working with water-based inks that require a gentler, yet effective, drying process. They offer a balance between speed and energy consumption, making them suitable for a variety of substrates.
In my experience, IR lamps play a crucial role in many printing applications. Here are some of the most common uses:
Drying inks and coatings in printing processes
Textile printing and dyeing drying
Ink drying vehicles and drying ovens
Accelerating drying and curing of inks, coatings, and varnishes alongside UV curing lamps
Improving the finish quality of magazines, newspapers, labels, posters, banners, and packaging materials
I have seen how IR lamps help reduce energy consumption and shorten production times. Their precise radiation ensures consistent results across different materials. When I use IR technology, I notice improved adhesion and enhanced surface finish quality. YFR provides IR solutions that integrate seamlessly into my printing setup, supporting a wide range of industrial applications.
Tip: For inks like silver nanoparticle formulations, near-infrared lamps offer optimal compatibility. The absorbance properties of these inks align with the emission spectrum of NIR lamps, enabling efficient sintering and rapid drying. This results in high-quality prints with excellent conductivity and minimal defects.
I always consider the type of ink and substrate before selecting an IR lamp. Water-based and solvent-based inks respond best to IR curing, while UV curable inks require different technology. By choosing the right IR lamp, I ensure my printing process remains efficient and my output meets the highest standards.
When I use an IR curing lamp in my printing machine, I see how the process transforms ink drying. The lamp emits electromagnetic waves that penetrate the substrate. These waves cause the molecules in the ink and substrate to vibrate, generating heat from within. This internal heating dries the ink quickly and evenly. I notice that this method prevents surface overheating, which protects delicate materials and maintains print quality. The IR energy targets the ink layer directly, speeding up the curing of the ink and reducing the risk of smudging or color bleeding. I rely on this technology to achieve consistent results, especially during high-speed production runs.
I often work with water-based inks, which require efficient drying to avoid delays in production. IR lamps excel at this task. The energy from the lamp is quickly absorbed by the water molecules in the ink. This rapid absorption leads to fast evaporation, allowing me to move prints through the line without waiting. I find that the wavelength of the IR lamp plays a crucial role. By matching the lamp’s wavelength to the absorption properties of water-based inks, I achieve optimal ink drying and vibrant, sharp prints.
Solvent-based inks also benefit from IR curing. The IR energy heats the solvent components, causing them to evaporate efficiently. I select the right IR lamp based on the solvent’s absorption characteristics. This ensures that the ink dries thoroughly without damaging the substrate. I appreciate how IR lamps provide uniform heat, which helps maintain the integrity of both the ink and the material. This compatibility with different ink types makes IR technology a versatile solution in my printing operations.
Integrating IR curing lamps into my printing machines has transformed my workflow. I install the lamps in key positions along the production line, often combining them with UV curing systems for maximum efficiency. The IR lamps deliver targeted heat, accelerating drying times while protecting sensitive materials. I use specialized IR temperature sensors, such as the Exergen IRt/c.03, to monitor ink temperature in real time. These sensors, cooled by continuous airflow, prevent overheating and preserve print quality. I also pay attention to the selection of lamp wavelength, power level, and materials like quartz glass and tungsten filaments. Reflective layers help redirect unabsorbed IR energy back to the substrate, increasing heating efficiency. By integrating IR lamps with control systems, I can adjust power and temperature quickly, ensuring consistent drying and curing conditions. This setup allows me to optimize print quality and production speed, making my operation more reliable and efficient.
Tip: I always match the IR lamp’s wavelength and power to the substrate and ink type. This approach ensures efficient energy use and top-quality results.
When I use an infrared curing lamp in my printing setup, I notice a dramatic improvement in drying speed. The IR energy targets the ink directly, which accelerates the evaporation of water or solvents. This process reduces waiting times between print runs. I can move prints quickly from one stage to the next without worrying about smudging or incomplete ink drying. In my experience, IR lamps cut drying times from several minutes to just a few seconds. This speed allows me to handle urgent orders and high-volume jobs with confidence.
I rely on IR technology to maintain a steady workflow. The consistent heat output ensures that every print receives the same level of drying, regardless of the substrate or ink type. I have found that this reliability helps me meet tight deadlines and deliver quality results to my clients.
Tip: For large-format prints or thick substrates, I always position the IR lamps to maximize coverage. This approach guarantees even drying across the entire surface.
Energy efficiency remains a top priority in my printing operations. IR lamps provide targeted heating, which means I only use energy where it is needed most. Unlike traditional hot air systems, IR technology does not waste energy heating the surrounding air. I have seen a noticeable reduction in my energy bills since switching to IR lamps for ink drying.
The quick response time of IR lamps also contributes to energy savings. I can turn the lamps on and off instantly, which eliminates unnecessary power consumption during downtime. The precise control over temperature and intensity allows me to fine-tune the drying process for each job. This flexibility ensures that I use the minimum amount of energy required for effective ink drying.
Lower energy consumption
Reduced operational costs
Environmentally friendly printing
Print quality stands at the core of my business. IR lamps help me achieve sharp, vibrant images by ensuring thorough and uniform drying. When ink dries evenly, colors appear more consistent and details remain crisp. I have noticed fewer issues with color bleeding or smudging since adopting IR technology.
The gentle, controlled heat from IR lamps protects sensitive substrates from warping or damage. I can print on a wide range of materials, including textiles, paper, and synthetic films, without compromising quality. The ability to adjust IR intensity means I can match the drying process to the specific needs of each print job.
Note: Consistent ink drying leads to fewer reprints and less waste, which boosts overall productivity and customer satisfaction.
I have always valued the ability of infrared curing lamps to minimize heat-related problems in my printing operations. When I use electric IR curing lamps, I notice that they emit mostly short-wave infrared energy. This energy penetrates multiple coating layers and heats the substrate from the inside out. Because of this, I can operate at lower temperatures and reduce the risk of heat damage, especially when working with sensitive materials like plastics.
One of the biggest advantages I see is the instant response of electric IR lamps. They reach full temperature almost immediately and cool down just as quickly. This feature gives me precise control over the curing process. I do not need to worry about overheating or damaging nearby plastic parts. I can also avoid the hassle of masking off sensitive areas, which saves me time and effort.
In contrast, I have found that gas catalytic IR systems and traditional thermal drying methods create more heat-related challenges. Gas catalytic systems require preheating and often produce higher ambient temperatures. This can lead to inconsistent heat distribution and a greater risk of damaging plastic components. Thermal drying methods, such as gas-powered ovens or convection, expose substrates to higher temperatures for longer periods. This increases the chance of heat damage, especially for heat-sensitive materials.
Here are some key ways infrared curing lamps help me reduce heat issues:
Deliver controlled, consistent, and lower temperature short-wave IR energy.
Transfer heat directly to the substrate, minimizing heat loss to the surrounding air.
Enable precise temperature control with instant on/off capability.
Eliminate the need for special masking of sensitive parts.
Reduce the risk of warping, melting, or discoloration on plastics and other delicate substrates.
Tip: I always monitor the temperature closely when working with sensitive materials. The precise control offered by electric IR lamps gives me confidence that my prints will remain undamaged and high-quality.
I rely on infrared curing lamps because they handle a wide variety of substrates and ink types in my printing business. This versatility allows me to take on diverse projects without worrying about compatibility issues. I have used IR curing lamps on films made from polyester, polyolefins, polyurethanes, polycarbonate, PVC, and even blends of these materials. I also process rigid and semi-rigid substrates like glass, metals, and different plastics. This flexibility means I can print on display screens, windows, graphic articles, and signs with consistent results.
The range of ink types that work with IR curing lamps impresses me. I can cure UV-curable inks that contain infrared-absorbing components, as well as inks designed for flexographic printing at room temperature. I often print geometric features with heights from 1 to 5 micrometers, and IR lamps handle these details with ease. The technology supports ink compositions that include UV-curable binders and photoinitiators, making it suitable for advanced printing applications.
I choose from several types of IR lamps to match the needs of each job:
Fast medium wave infrared lamps (peak 1.4–2.0 μm) for quick heating and drying.
Carbon medium wave infrared lamps (peak 2.0–4.0 μm) for fast surface heating and moisture removal.
Medium wave quartz infrared lamps (peak 2.2–4.0 μm) for drying thin materials and plastics.
This range of options lets me process everything from thin films to rigid panels. I use IR heating for plastic forming, laminating, packing, and curing thin films. The adaptability of IR curing lamps keeps my workflow efficient and my output consistent, no matter the substrate or ink type.
Note: The broad compatibility of IR curing lamps gives me the freedom to expand my services and meet the needs of a wide range of clients.
When I compare infrared curing lamps to UV curing systems, I see clear differences in their applications and strengths. UV curing uses ultraviolet light to initiate a chemical reaction in specially formulated inks and coatings. This process creates an instant, hard finish. I use UV curing when I work with UV-reactive inks, which require this specific energy to cure. The result is a durable, scratch-resistant surface that stands up to handling and environmental exposure.
However, not all inks respond to UV light. Many water-based and solvent-based inks do not contain the photoinitiators needed for UV curing. In these cases, I rely on infrared curing lamps. IR technology excels with inks that cannot be cured by UV, making it a versatile choice for a broader range of printing applications. I appreciate the flexibility this gives me when switching between different ink types and substrates.
Tip: I always check the ink formulation before choosing between UV and IR curing. This ensures I get the best results for each print job.
Air drying remains a traditional method in many print shops. I have used both natural and forced warm-air drying for water-based inkjet inks. Forced warm-air drying can achieve extremely fast drying times—sometimes less than one second, depending on the substrate. This method quickly evaporates the water carrier fluid, which helps me maintain high production speeds.
Here’s how air drying compares to infrared curing:
Forced warm-air drying often dries water-based inks faster than infrared curing.
Air drying preserves print quality by reducing the risk of defects like blistering, discoloration, or surface skinning.
Infrared curing can produce a hard, bright film but requires careful control to avoid adhesion issues or defects.
Some inks, such as thermosetting coatings, need infrared radiation for proper crosslinking and adhesion.
A ramp/soak approach with infrared drying—gradually increasing temperature—helps prevent damage and shortens drying time.
I have learned that while air drying works well for many inks, certain formulations demand the targeted energy of infrared lamps. I always monitor the drying process closely to maintain print quality and avoid defects.
Note: Silicone-based coatings and thermosetting inks often require infrared drying for optimal results.
In my experience, combining infrared curing lamps with other drying methods delivers the best of both worlds. I often use IR lamps alongside hot air or UV systems to optimize drying and curing. This approach enhances efficiency, improves product quality, and reduces overall drying time.
Scenario | Combined Methods | Benefits |
|---|---|---|
Wood coating and paint curing | Faster processing, energy savings, suitable for heat-sensitive materials, improved quality | |
Drying water-based adhesives on wood | IR + UV | Efficient drying, better abrasion resistance, improved surface properties |
Powder coating on MDF boards | IR + UV | Efficient powder melting, faster curing, higher finish quality |
Drying biomaterials (e.g., chrysanthemum) | IR + Hot air drying | Enhanced drying efficiency, reduced time, better color and aroma preservation |
Drying edible plants and flowers | IR + other drying | Improved product quality, process stability, and safety |
I find that high-speed air movement enhances heat transfer on the surface, while IR radiation penetrates and heats the material from within. This synergy allows me to dry sensitive substrates quickly without sacrificing quality. When I need to process complex jobs or unique materials, I often turn to a combination of IR and other methods for the best outcome.
Tip: I always tailor my drying approach to the specific ink and substrate. Combining technologies often leads to superior results and greater production flexibility.

When I select an infrared curing lamp, I always start by checking the compatibility with my printing machine. Each printer model has unique requirements for lamp size, mounting, and electrical connections. I review the machine’s technical documentation to confirm the maximum lamp length, diameter, and power rating it can support. Some machines require specific lamp shapes, such as straight tubes or U-shaped designs, to fit into tight spaces. I also consider the control system. My printer must allow precise adjustment of lamp intensity and temperature. This flexibility helps me fine-tune the drying process for different jobs. I look for lamps that integrate easily with my existing sensors and safety features. Reliable brands like YFR often provide detailed compatibility charts, making the selection process straightforward. By ensuring a perfect fit, I avoid installation issues and maintain consistent print quality.
Choosing the right lamp goes beyond machine fit. I pay close attention to the ink and substrate combination in every project. The properties of both materials determine how much heat they can handle and how efficiently they absorb infrared energy. Here is my approach:
I assess the spectral absorbance, specific heat, and thermal conductivity of the ink and substrate. These factors influence how quickly the surface heats up during curing.
I consider the type of ink. Water-based and solvent-based inks respond differently to IR energy. Some inks require higher temperatures, while others cure at lower settings.
I evaluate the substrate’s heat tolerance. Thin films, plastics, and specialty papers can warp or discolor if exposed to excessive heat.
I monitor the surface temperature closely. If I notice the substrate or ink getting too hot, I adjust the lamp’s power or use air cooling to protect the material.
I select lamps with smaller bulb diameters or de-focus the lamp when working with sensitive substrates. This approach helps me manage heat and prevent damage.
Tip: Matching the lamp’s output to the ink and substrate ensures efficient curing without risking print defects or material damage.
Technical specifications play a crucial role in my decision-making process. I always review the following key specs before making a purchase:
Specification | Description |
|---|---|
Wavelength Range | The range of infrared wavelengths the lamp emits. I match this to the ink’s absorption peak. |
Power (Watts) | Indicates lamp intensity. Higher power covers larger areas or thicker ink layers. |
Voltage | The required electrical input for safe operation. |
Life Hours | Average operational lifespan. Longer life reduces maintenance downtime. |
Operating Temperature | Safe temperature range for continuous use. |
Physical Dimensions | Includes length, heated area, diameter, and weight. Ensures proper fit in my machine. |
Features | Options like twin tubes, reflectors, or water-cooling enhance performance and durability. |
I always match the lamp’s wavelength and power to the ink and substrate for optimal results. For example, I use lamps with a peak wavelength of 850 nm for higher radiant intensity and quick drying. When I need to cover a wide area, I choose lamps with a broader beam angle. For delicate jobs, I select lamps with shatterproof designs and advanced cooling features. By focusing on these specifications, I ensure my infrared curing system delivers reliable, high-quality results every time.
When I choose an infrared curing lamp for my printing machine, I always pay close attention to the brand. The right brand can make a big difference in performance, reliability, and long-term satisfaction. Over the years, I have developed a checklist that helps me evaluate brands before making a purchase.
First, I look for brands with a strong reputation in the printing industry. I read reviews from other professionals and check for case studies or testimonials. A brand that consistently receives positive feedback usually delivers reliable products. I also ask colleagues about their experiences. Word-of-mouth recommendations often reveal insights that online reviews miss.
Next, I consider the level of technical support and customer service. I prefer brands that offer responsive support teams and clear documentation. When I encounter a technical issue, I want quick answers and practical solutions. Brands that provide installation guides, troubleshooting resources, and direct contact with engineers stand out to me.
Innovation matters as well. I look for brands that invest in research and development. Advanced features like energy-efficient designs, smart temperature controls, and compatibility with modern printing systems show that a brand stays ahead of industry trends. I have noticed that innovative brands often release updates or new models that improve efficiency and print quality.
Warranty and after-sales service play a crucial role in my decision. I choose brands that back their products with solid warranties and easy access to replacement parts. This support reduces downtime and keeps my production line running smoothly.
Here is a quick checklist I use when evaluating brands:
✅ Industry reputation and user reviews
✅ Responsive technical support
✅ Innovative features and technology
✅ Comprehensive warranty and after-sales service
✅ Compatibility with my printing equipment
Tip: I always request a sample or demonstration before committing to a large order. This hands-on experience helps me judge the lamp’s build quality and performance.
YFR stands out as a brand that meets all these criteria. I have used YFR infrared curing lamps in several projects. Their products integrate seamlessly with my machines, and their support team responds quickly to my questions. The lamps deliver consistent results, and I appreciate the advanced features that help me optimize energy use and print quality.
When I install an infrared curing lamp in my printing facility, I always follow a systematic approach to ensure stability and performance. First, I assemble the lamp stand according to the manufacturer’s instructions. I make sure the stand sits on a flat, even surface to prevent any risk of tipping. The heating elements are fragile, so I handle them with care during unpacking and assembly. I never touch the elements when they are hot or before they have cooled completely.
Next, I attach the lamp arm to the stand using the supplied hardware. I adjust the height and angle to match the needs of my printing process, then tighten all knobs and lock handles securely. I position the lamp at least three inches away from the workpiece. This distance helps me avoid overheating or burning the substrate. I never operate the lamp directly on the floor or on an unstable surface.
For electrical safety, I use a grounded outlet and select the right extension cord—14 gauge for up to 25 feet, 12 gauge for longer distances. I always keep the lamp at least 25 feet away from flammable materials and never operate it within 10 feet of powder application. I use an infrared thermometer to monitor the curing area’s temperature, adjusting the lamp’s distance to maintain the recommended range. When curing, I move the lamp systematically over the surface, starting from the bottom up or following the shape of the print. After curing, I let the piece cool before handling and perform a wipe test to confirm complete curing.
Tip: I never leave the lamp unattended while in use and always add extra stability to the stand with sandbags or weights if needed.
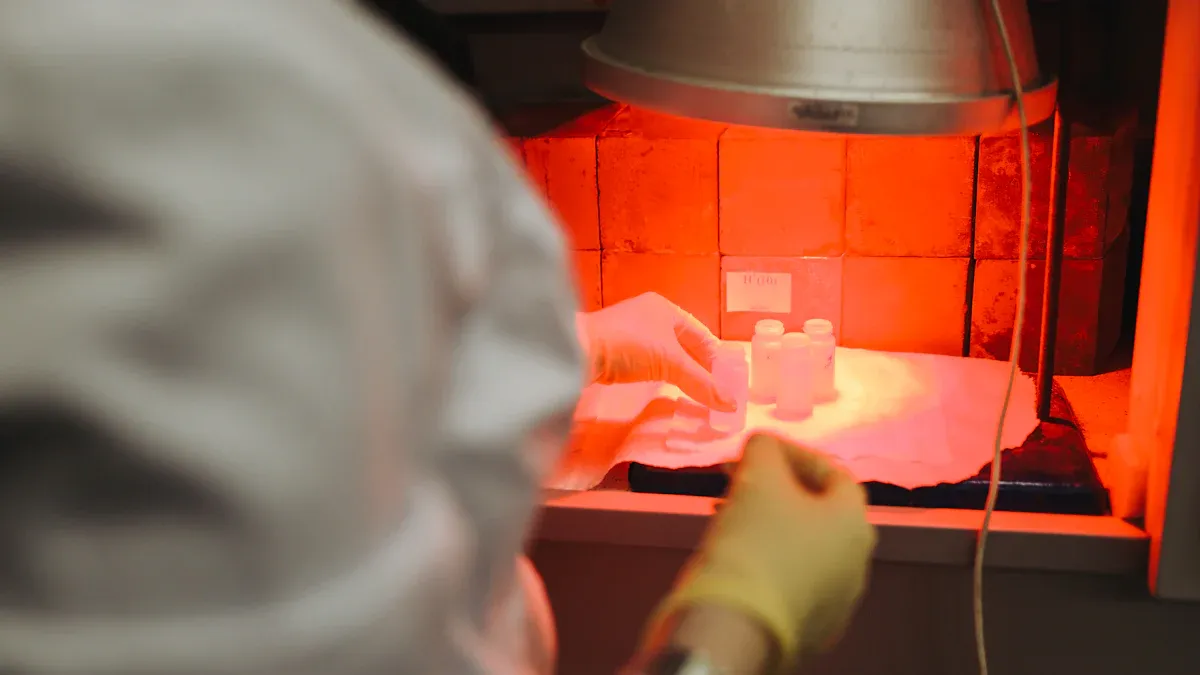
Safety remains my top priority when operating infrared curing lamps. I always maintain the temperature within the recommended range, usually between 320°F and 400°F, to prevent overheating. I keep the lamp at least three to four inches from the workpiece. I monitor the temperature every few minutes and adjust the lamp’s position as needed.
I never operate the lamp near flammable materials. I avoid looking directly at the infrared elements to protect my eyes. I use a stable stand to prevent accidental tipping. Before performing any maintenance or replacing elements, I unplug the unit. I handle quartz elements carefully to avoid breakage and injury. I always use grounded outlets and proper extension cords for electrical safety. I never leave the lamp running unattended.
Note: Consistent safety checks help me prevent accidents and keep my workspace secure.
Routine maintenance keeps my infrared curing lamps running efficiently and extends their lifespan. I ensure proper air cooling by maintaining good airflow around the lamp. I regularly clean the lamps with a lint-free cloth and designated glass cleaner to remove dust and contaminants. I inspect bulbs for swelling or warping and replace them immediately if I notice any issues.
I also check and replace air filters to keep the cooling air clean. I clean internal ballast components with compressed air and a vacuum to remove dust buildup. I maintain the reflectors by wiping them with a lint-free cloth and replacing them if they appear dull after cleaning. I always avoid touching new lamps with bare hands to prevent surface damage.
Maintenance Task | Frequency | Purpose |
|---|---|---|
Clean lamps and reflectors | Weekly | Maintain output and efficiency |
Inspect bulbs for damage | Weekly | Prevent reduced curing performance |
Replace air filters | Monthly | Ensure proper cooling airflow |
Clean ballast components | Monthly | Avoid overheating and premature failure |
Tip: Regular maintenance reduces downtime and ensures consistent curing quality in my printing operations.
When I operate infrared curing lamps in my printing setup, I sometimes encounter issues that can disrupt production. Over time, I have developed a systematic approach to troubleshooting. I always start by identifying the symptoms, then I work through possible causes and solutions.
Problem | Possible Cause | My Solution |
|---|---|---|
Lamp does not turn on | Power supply issue, blown fuse | I check the power cord, outlet, and fuses. |
Uneven drying or curing | Misaligned lamp, dirty reflector | I realign the lamp and clean the reflector. |
Flickering or dim light | Loose connection, aging bulb | I tighten connections or replace the bulb. |
Overheating or burning smell | Blocked airflow, faulty fan | I clear vents and inspect the cooling fan. |
Reduced curing performance | Dust buildup, worn-out lamp | I clean the lamp and replace if necessary. |
Check Power and Connections
I always begin by verifying that the lamp is plugged in securely. I inspect the power cord for damage. If the lamp does not power on, I test the outlet with another device. I also check the circuit breaker and replace any blown fuses.
Inspect the Lamp and Reflector
I look for visible signs of damage or dirt on the lamp and reflector. Dust or ink residue can block infrared energy. I clean these components with a lint-free cloth and approved cleaner.
Monitor Temperature and Airflow
I use an infrared thermometer to check the lamp’s operating temperature. If I notice overheating, I examine the cooling fan and air vents. I remove any obstructions and ensure proper airflow.
Test Bulbs and Electrical Components
When I see flickering or dimming, I check for loose wires or connectors. I gently wiggle the connections to see if the light stabilizes. If not, I replace the bulb with a new one.
Evaluate Curing Results
If prints show uneven drying, I adjust the lamp’s position and height. I make sure the lamp covers the entire print area. I also verify that the lamp’s wavelength matches the ink and substrate.
Tip: I always keep spare bulbs and fuses on hand. Quick replacements minimize downtime and keep my production line moving.
If I cannot resolve the issue after these steps, I contact the manufacturer’s technical support. Brands like YFR offer responsive assistance and can guide me through advanced diagnostics. I document the problem, including error codes or unusual sounds, to help the support team provide accurate solutions.
By following this troubleshooting routine, I maintain consistent performance from my infrared curing lamps. I address small problems before they become major disruptions, ensuring reliable and efficient printing operations.
In my daily printing operations, I sometimes face drying problems with infrared curing lamps. These issues can disrupt production and affect print quality. I notice that prints may remain tacky or sticky even after passing under the lamp. Sometimes, the ink does not cure evenly, leaving patches that look dull or glossy. On rare occasions, I see signs of overheating, such as melted finishes or warped substrates. I have also experienced situations where the lamp fails to turn on or flickers during operation.
Several factors can cause these problems. Incorrect lamp wattage often leads to insufficient or excessive heat. If I use a lamp outside the recommended 150-300 watt range, I risk poor drying or damage to the substrate. Inconsistent temperature control can also create issues. If the curing area exceeds 400°F, the finish may stick or melt. On the other hand, if the temperature drops below 100°F, the ink may not cure fully. Lamp placement matters as well. If I position the lamp too close or too far from the print, I see uneven results. Dirty lamp housings or reflectors can block infrared energy, reducing efficiency. Electrical issues, such as loose connections or faulty sockets, sometimes prevent the lamp from operating correctly.
Tip: I always allow surfaces to cool before sanding or recoating. This step prevents finish defects and ensures a smooth workflow.
When I encounter drying problems, I follow a systematic troubleshooting process. Over time, I have developed a checklist that helps me resolve most issues quickly and safely.
Here are the steps I take:
I verify the power supply by checking circuit breakers and fuses. If the lamp does not turn on, I inspect the bulb connection and clean the contacts.
I replace the bulb if it flickers or fails to light up. I also check the socket for faults and seek professional help if needed.
I clean the lamp housing and reflectors to prevent overheating and maintain efficient energy transfer.
I monitor the curing temperature with a remote sensing thermometer. I keep the temperature near 100°F for proper curing and avoid exceeding 400°F.
I use lamps rated between 150-300 watts for optimal performance. I maintain a distance of about 6 inches from the substrate, especially for sensitive parts.
I employ heat sensors or controls to regulate lamp operation and prevent power spikes.
When replacing elements, I unplug the unit and let it cool. I remove end covers and grills, loosen mounting nuts, and handle quartz glass with care to avoid breakage. I dispose of used elements properly and install new ones gently.
Note: Consistent monitoring and maintenance keep my infrared curing lamps running smoothly. By following these steps, I minimize downtime and ensure high-quality prints every time.
After using infrared curing lamps in my printing workflow, I have seen faster drying, improved print quality, and greater energy efficiency. Selecting the right lamp for your machine and ink type makes a big difference in results. I recommend exploring IR technology if you want to boost productivity and reduce waste.
For more details or to upgrade your setup, reach out to trusted suppliers or check technical guides from brands like YFR.
I always check my machine’s manual or contact the manufacturer. I look for details about lamp compatibility, power requirements, and mounting options. Brands like YFR often provide compatibility charts for easy reference.
I use infrared curing lamps mainly for water-based and solvent-based inks. These inks respond well to IR energy. UV-curable inks require a different curing method. I always match the lamp to the ink type for best results.
I monitor lamp performance and replace it when I notice reduced drying efficiency or visible wear. Most lamps last several thousand hours. I follow the manufacturer’s guidelines for replacement intervals to maintain consistent print quality.
I always keep the lamp away from flammable materials. I use a grounded outlet and never touch the lamp when it is hot. I wear protective eyewear and gloves during maintenance. I never leave the lamp unattended while operating.
Yes, I often combine IR curing with hot air or UV systems. This approach speeds up drying and improves print quality. I adjust each method to fit the ink and substrate for optimal results.
I check the power supply, inspect the cord, and test the outlet. I replace blown fuses and check for loose connections. If the lamp still does not work, I contact technical support for further assistance.
I clean the lamp and reflectors weekly with a lint-free cloth. I check for dust buildup and replace air filters monthly. I inspect bulbs for damage and replace them as needed. Regular maintenance keeps my lamp running efficiently.


